API keys authenticate your requests to the Clearspeed Integration API. Keys are scoped to a specific questionnaire and carry explicit permissions — so a key created for one questionnaire cannot access another, and a key without participant:write permission cannot create participants.
This page covers:
- How authentication works
- Available scopes
- Creating your first API key from the web app
- Managing API keys via API
Every API request must include your API key in the Authorization header:
Authorization: <your-api-key>The key is validated against the questionnaire specified in the request (via project_uuid or the URL path). A key issued for questionnaire A will be rejected for questionnaire B.
When creating an API key you choose which actions it may perform. Each key can have one or more of the following scopes:
| Scope | Allows |
|---|---|
participant:write | Create participants |
participant:read | Read participant data |
participant:delete | Delete participants |
apikey:write | Create new API keys for the same questionnaire |
apikey:delete | Delete API keys for the same questionnaire |
Principle of least privilege — only grant the scopes your integration actually needs. A key used only for creating participants needs participant:write and nothing else.
Your first API key for a questionnaire must be created through the Clearspeed web application. You need an Admin role on the questionnaire or tenant to do this.
Navigate to the questionnaire you want to integrate with. In the questionnaire-specific left navigation bar, click Integration. The right panel shows an API Keys section at the top with an + Generate New button.
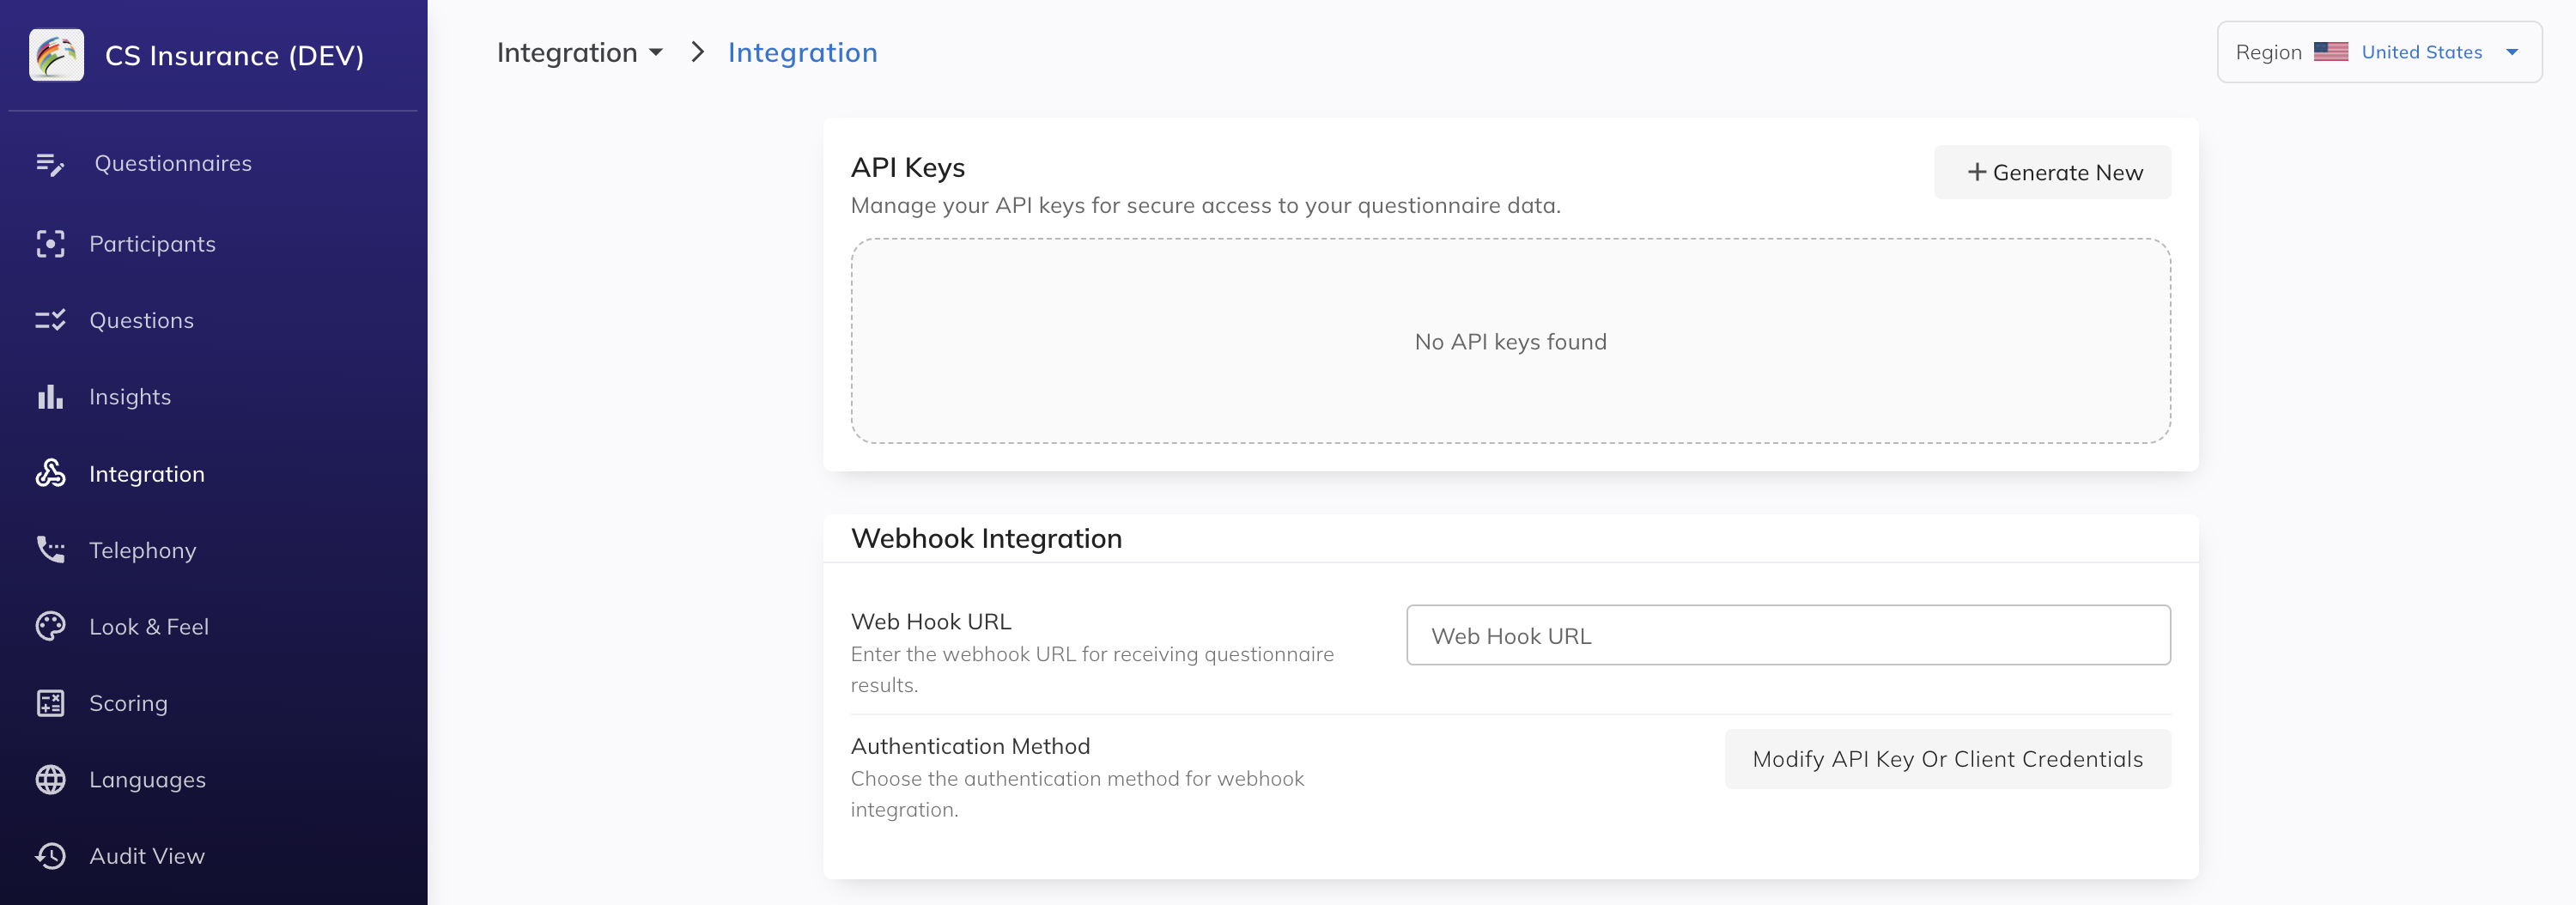 Screenshot placeholder — Integration page, API Keys section
Click + Generate New, enter a descriptive name (for example, production-participant-writer), and select the scopes your integration requires.
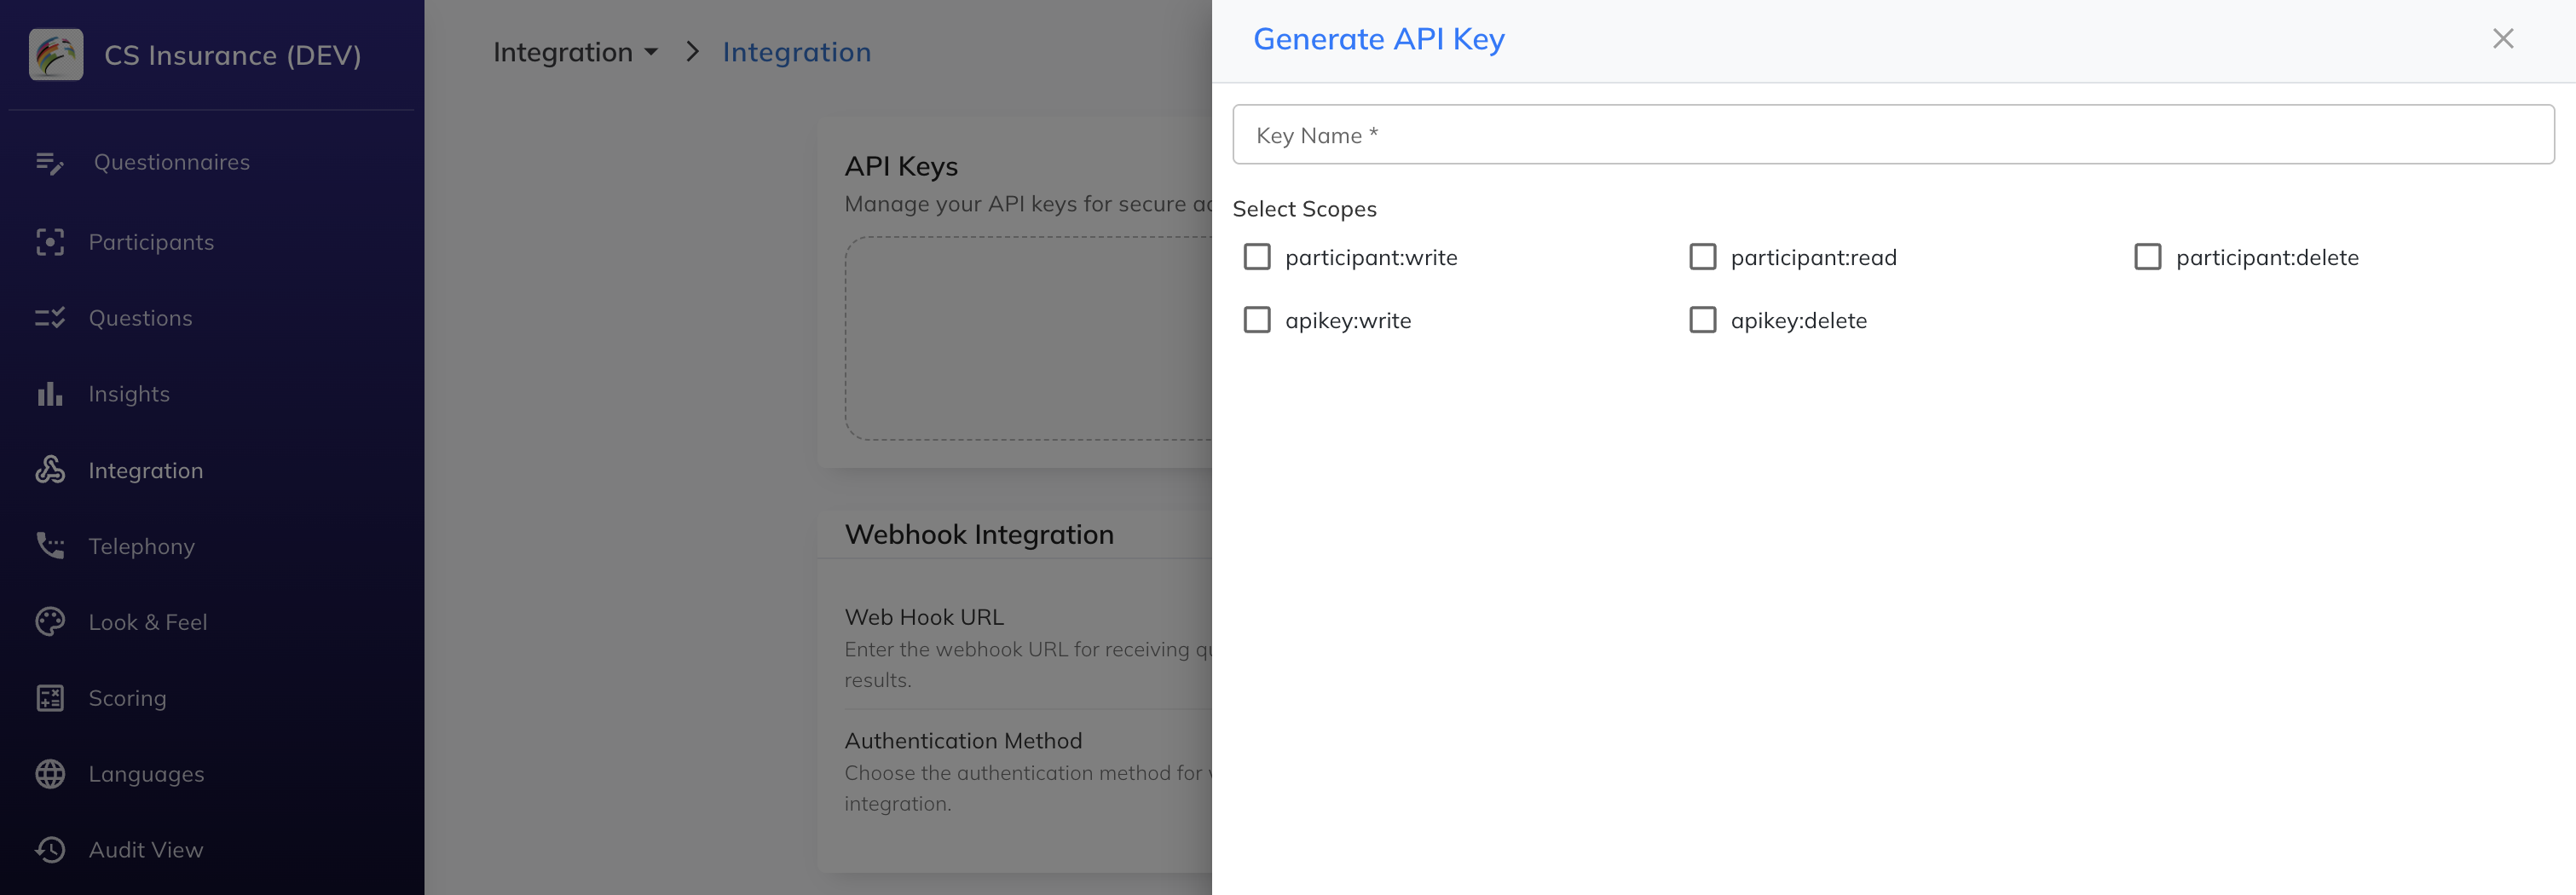 Screenshot placeholder — Create API Key dialog
The full API key value is available to copy at creation time and at any time afterwards from the API Keys list on the Integration page. Store it securely (for example, in your secrets manager).
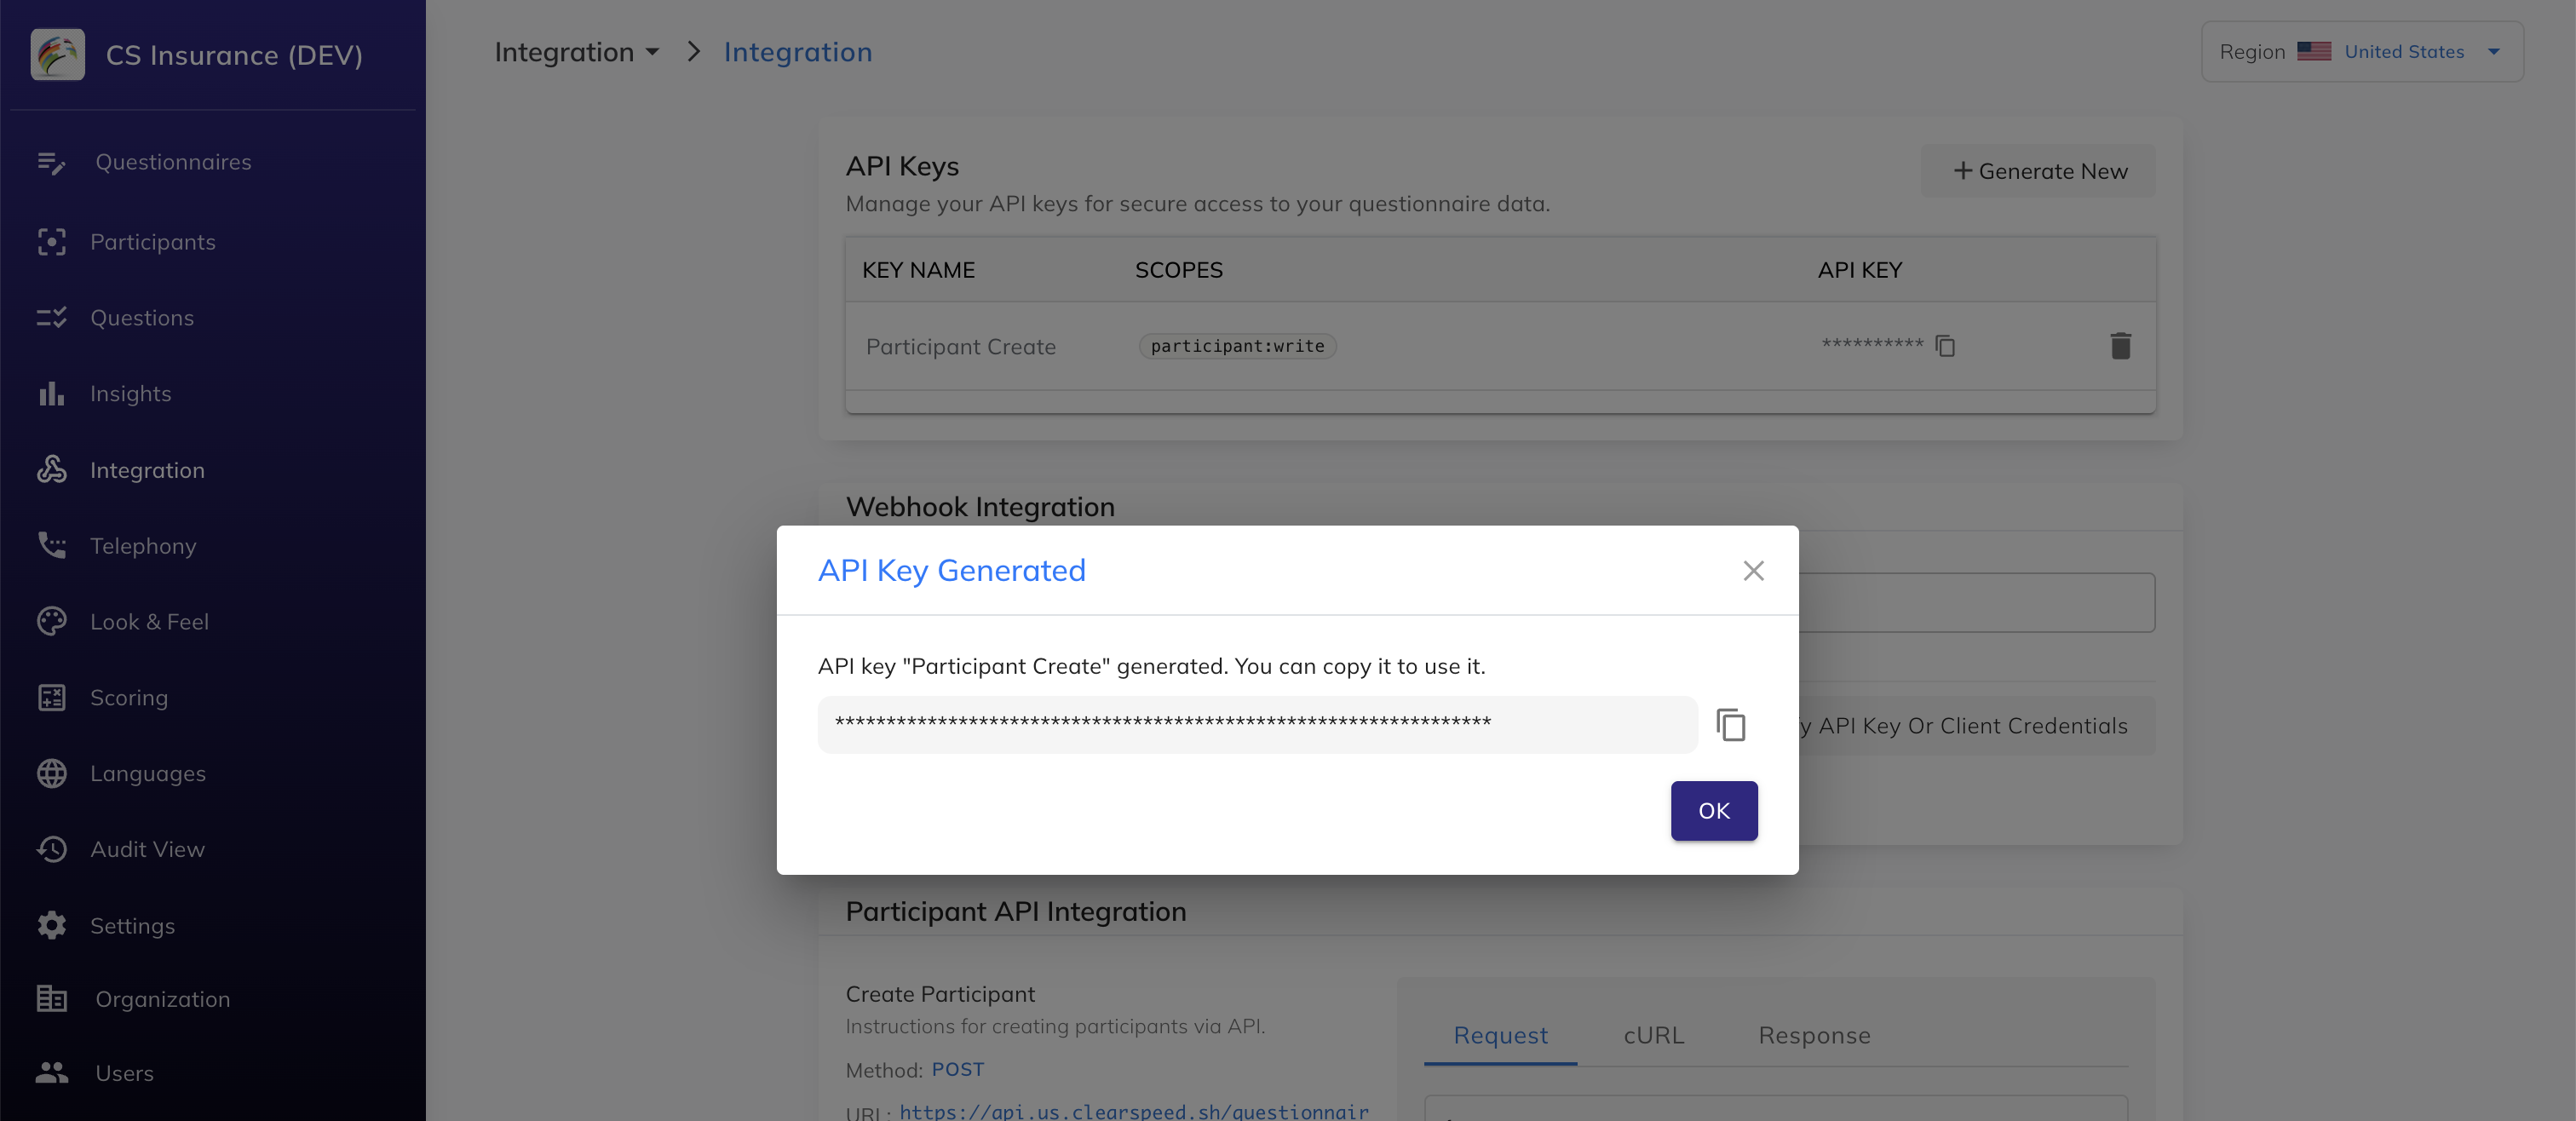 Screenshot placeholder — key created modal with copy button
After closing the dialog you will see the new key listed in the API Keys section on the Integration page, showing its name, scopes, and masked key value with a copy button. You can create additional keys or delete existing ones from this list at any time.
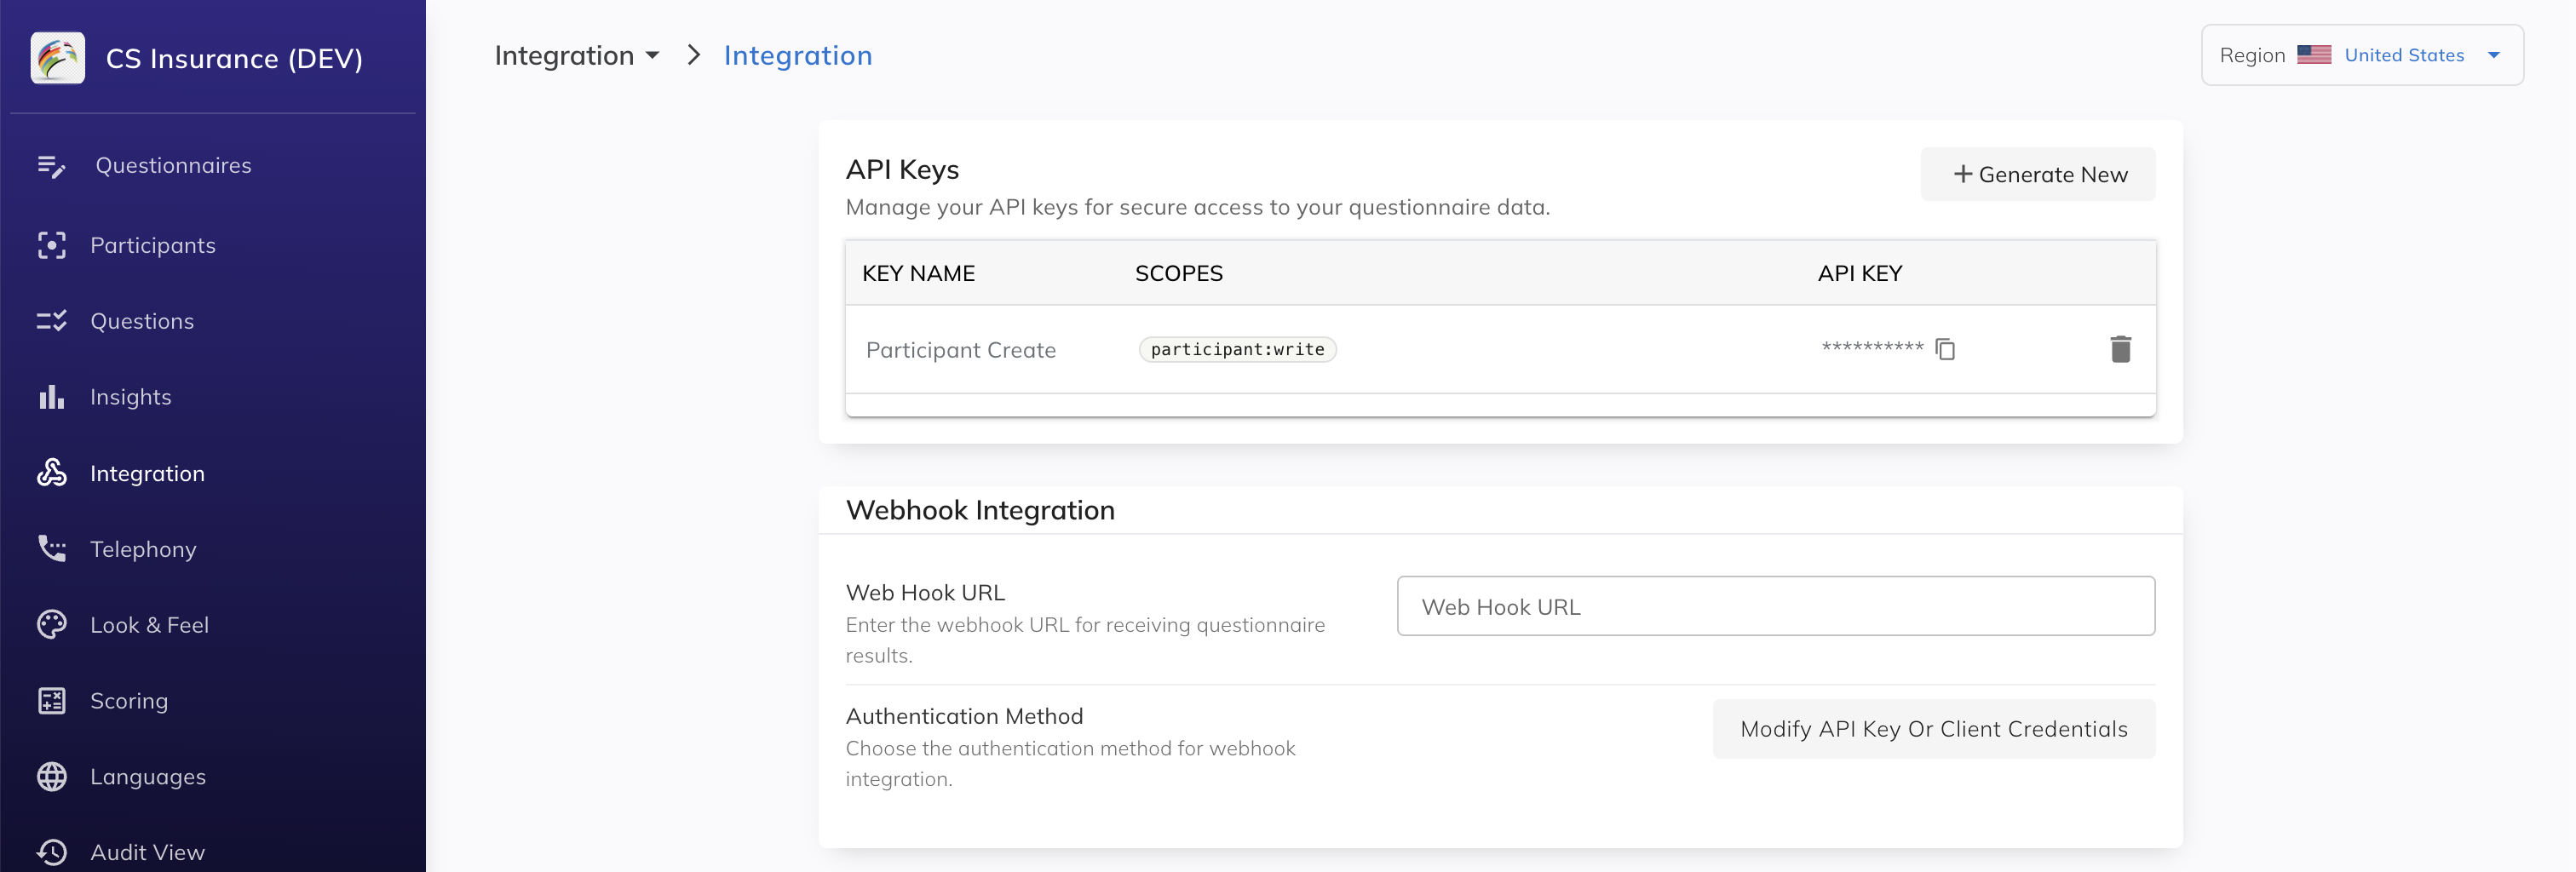 Screenshot placeholder — Integration page, API Keys list with new key visible
Once you have a key with the apikey:write or apikey:delete scope, you can create and delete keys programmatically — useful for key rotation and automation workflows.
See the Integration API reference for the full endpoint details, request/response schemas, and examples.
- Create a new key with the same scopes as the one being rotated.
- Update your integration to use the new key.
- Verify your integration is working.
- Delete the old key.
This zero-downtime approach ensures your integration is never without a valid key during rotation.
| Operation | Required scope |
|---|---|
| Create participant | participant:write |
| Update participant outcome | participant:write |
| Read participant data | participant:read |
| Delete participant | participant:delete |
| Create API key | apikey:write |
| Delete API key | apikey:delete |
Clearspeed sends result payloads to a webhook URL you configure per questionnaire. Your endpoint can be protected with either an API key or OAuth2 client credentials — Clearspeed will authenticate to your endpoint using whichever method you choose. See the Webhook Configuration guide for full setup instructions and the Integration API reference for the payload schema.